An Oil Painting Primer: Oil Painting Techniques for Every Artist
Are you new to oil painting techniques, returning after a long break, or looking for a why to elevate your existing skills?
These essential techniques can give you some guideposts to reference when you’re feeling lost. Discover practical tips and insights that are sure to boost your skill, inspiration, and oil painting techniques.
Understanding Oil Painting Techniques & Fundamentals
One of my biggest smh moments as an oil painter is when people say, “yeah, I stuck with (acrylic/watercolor/gouache), oil paint is just (too hard, takes too long to dry)”. Really, I beg to differ; I think oil is the easiest medium to work with, it’s just a matter of learning its language. For some reason, oil has earned this intimidating rep amongst the plebs. Many people just keep away, but today we’re diving right in. So here’s an acrostic to help us get acquainted:
- O – “oh my gosh, you’re an oil painter? That’s sooo intense & cool” – is what people will say when you tell them
- I – immense colour range; the richness of hues & chroma you can get with oil pigments is unmatched
- L – learn, and you will succeed.
- P – pretty much the most versatile painting medium.
- A – always forgives. When you make a mistake, it’s easy to correct.
- I – infinitely changeable; you can paint layer upon layer, upon layer…
- N – not for nay-sayers
- T – toxic; some pigments and mediums highly so, therefore informing yourself of proper studio safety habits is a must (check out this incredible resource — https://www.amazon.com/Artists-Complete-Health-Safety-Guide/dp/1581152043 )
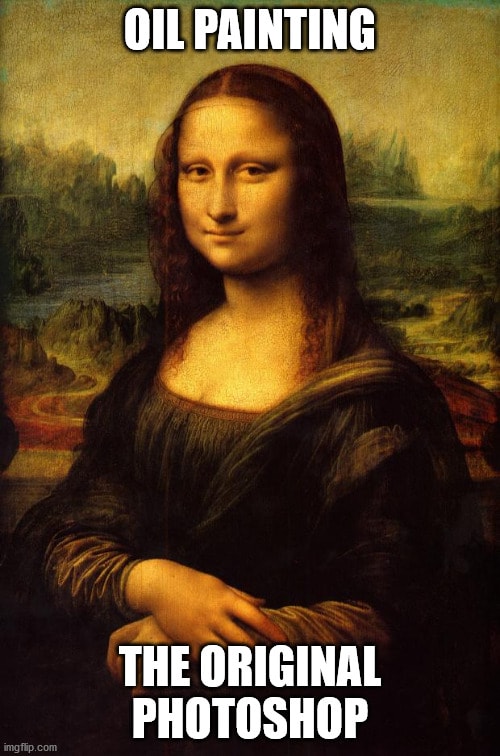
Oil paint consists of pigments suspended in a drying oil, often linseed or walnut oil, and others binding agents. Oil colors produce vibrant, brilliant colors that can last for centuries. The various approaches in oil allow for exceptional depth and realism in your work. Are you excited yet?!
Different Approaches for Oil Painting
There’s no one “right” way to tackle an oil painting, but here we’ll go over a few well-known approaches.
- Alla Prima is a technique that involves painting in layers without letting the base layer fully dry. Literally, “at first attempt,” an alla prima painting might be completed in one sitting. Many plein air painters will use this method when they’re on site. It requires skill to capture an image this way, without letting your paints get all muddied together.
- Direct painting is like alla prima, but perhaps requires the most planning and mastery of all approaches; you’re still painting wet-into-wet, but the idea is that once you’ve placed a brush stroke on the canvas, you don’t change it. It may not get blended, mixed, or covered over, and you won’t be painting in layers. No underpainting, no buildup of values…just colors, moments, values, and shapes, as they are perceived.
- Indirect painting is what we’ll be focusing on today. This is done in stages, and can involve multiple painting sessions, multiple layers, an underpainting—the works.
The benefit of indirect painting is the opportunity to correct any mistakes you’ve made in previous sessions.
These are just a few key words you may stumble across in your studies, but really, the approaches to oil painting are as different as the scores of artists who practice them.
Tools of the Trade – Your Essential Painting Supplies
If you’re just getting started, the amount of oil painting-specific tools out there can make you want to duck & run out of the art store. My recommendation—keep it simple. You can’t go wrong with these basic supplies:
- Oil painting brush multipack, or set of synthetic brushes
- A few primed canvases, canvas boards, or panels of different sizes – multipacks are a great idea for beginners and pros. The canvas texture is something to consider when you’re choosing between different substrates!
- A variety of student-grade oil paints, which often come in sets of 10 or more
- Gamsol/other odorless mineral spirits or Stand oil, like safflower, for cleaning brushes
- Lots of rags – paper towels are okay for cleaning brushes, but little else!
- A painting palette
- Nitrile gloves, artguard, or another hand protectant—especially if you’re a messy painter
- A well-ventilated workspace
*a note about student-grade pigments: when an oil color is labeled “student grade,” this typically means there is a lower pigment-to-vehicle ratio in the tube, meaning less of that precious . This isn’t necessarily a bad thing, as some artists may find them easier to work with than professional-grade. The qualities of different pigments will vary, but the paints are cheaper. I have a few tubes left over from my high school days that I’ll still use when I have large areas to cover in an underpainting.
A simple upgrade would be an easel, but don’t go breaking the bank. I have found some of my best studio furniture second-hand, so look on marketplace or ebay to find a quality easel that will get you started. Many artists prefer water mixable oil paints to traditional oils, but it’s hard to compare the two if you haven’t tried out the latter first.
Painting Mediums – Who, What, When, Where, & Why?
Mediums are one of the essential materials found on nearly every oil painter’s table. While they are not strictly necessary for oil painting, they can alter, enhance, and elevate your process in exceedingly useful ways.
- Solvents – mineral spirits, turpenoid, gamsol. All of these products, though sometimes labeled non-toxic, are volatile, flammable, and give off strong odors when open, and so it’s important to work in a well-ventilated space. “turps” can be used as a medium, and are often the go-to for an underpainting. Most commonly, though, they’re used as a cleaner for your brushes.
- Oils – oils come in many forms. Linseed is the most classic, but walnut & safflower are also common choices. Be sure to read into the properties of each, as the pros and cons differ from one old to the next. Walnut, for example, is a slow-drying oil that will extend the drying time of most pigments; this can be a huge boon if you’re working on a highly detailed pass that can take multiple days. Cold pressed Linseed oil, on the other hand, is a proven non-yellowing medium that improves the flow and speeds drying time of your oil paints.
- Cold wax – One of my personal favorites is cold wax, which has a fatty Crisco-like texture that can be used for impasto passes, among other things.
- Alkyds, resins, gels, & more – this class of mediums unlocks the versatility of your oil paints. These mediums most notably change the viscosity, texture, flow, and drying times of your oil colors, and can add certain specific qualities, like retention of brush strokes or high gloss.
As you discover different manufacturers in the art world, you’ll find many brands have a slew of unique mediums with very specific applications. While we won’t get into the specifics of the myriad of options here, it’s worth it for you to explore different mediums from different manufacturers as you develop.
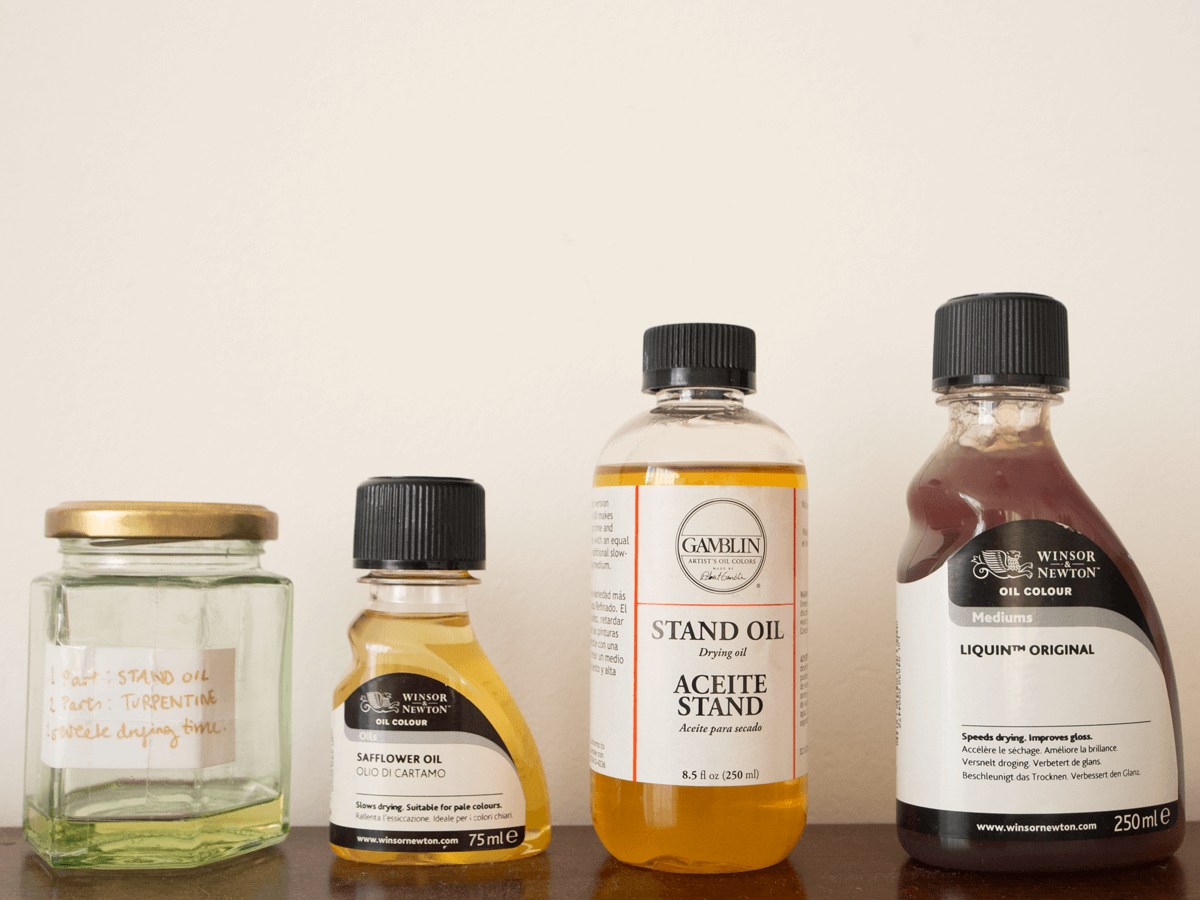
*pro-tip: most manufacturers have guides to their mediums on their websites. These are such a great reference if you don’t know where to start, and give you insight into all the qualities of various mediums.
Getting Started – The Underpainting
As noted in the “Approaches” section, there are many ways to get started. Here, we’re going to talk about working with and underpainting.
Let’s go.
- First and foremost, make sure you’re working with an acrylic gesso-primed surface. If you’re painting on a substrate like unprimed wood, MDF, or raw canvas, there are a few essential steps you need to take to ready your surface, but we won’t get into that here. Just know that if you’re applying paint directly to that substrate without sealing, priming, and gessoing—it’s not going to end well.
- Now it’s time to dive in. If you’re painting all prima, you won’t be transferring a sketch, just painting on-site. But if you’ve developed a complex image or have a reference drawing/photo, you’ll want to transfer it to your surface. Here are a few methods to try:
- Charcoal transfer: print out your image in the size you’ll be painting on your canvas. Scrub the back with a layer of vein charcoal, tape your image to the canvas, and start tracing the standout lines of the image with a pen or pencil.
- Oil transfer: this is just like the previous method, only you use oil paint instead of charcoal. To achieve a cleaner transfer, you can gently wipe some of the paint off the paper before taping it onto your canvas.
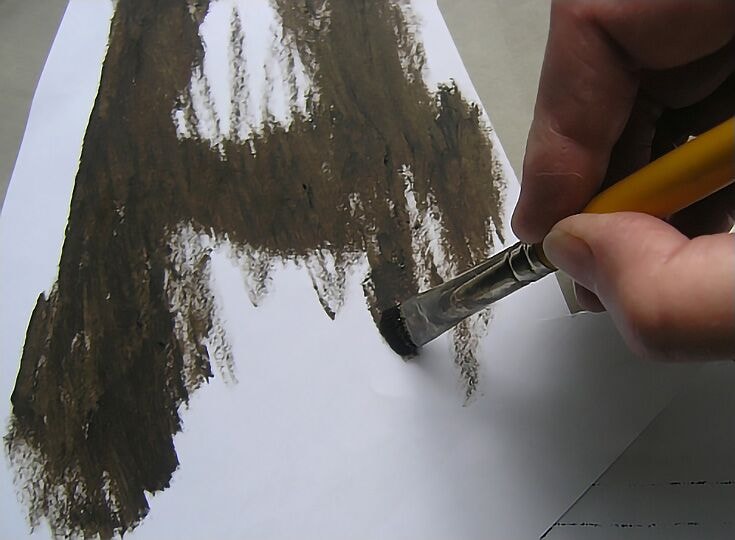
An artist uses the oil transfer method. Note, no medium has been added to the oil colour here.
- Direct method oil painting: you can also just sketch your image, with either charcoal or thinned oil (pigment + solvent, or stand oil), without the aid of these other transfer methods.
- Grid method: If you don’t want to get so messy or have a huge image to transfer, this method is a great option. Add a to-scale grid on top of your image, where each square = 1 square in of your actual painting (or some other ratio). Lightly sketch gridlines onto your canvas with a ruler & charcoal, and start transferring your image square by square.
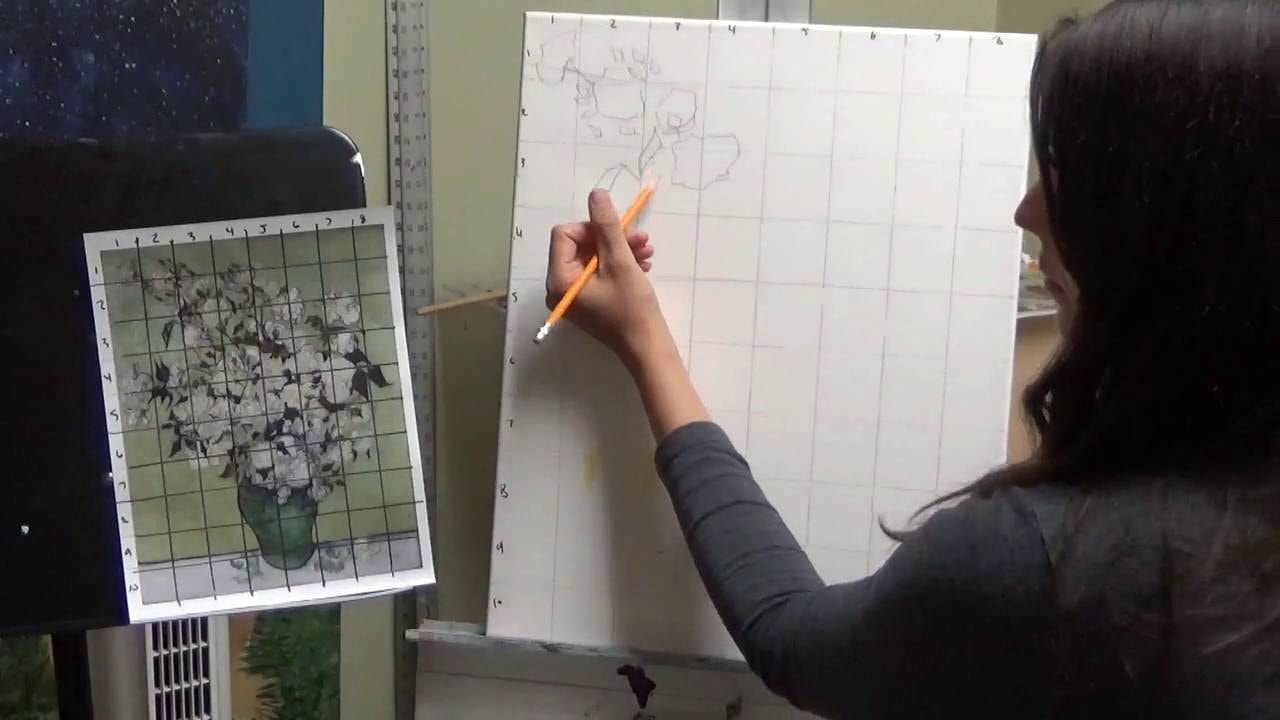
An artist applying the grid method for transfer.
*if you’re using charcoal to make your sketch, be sure to seal it with spray fixative before painting. If you don’t the charcoal will lift right up and mix with your paints – yuck. You can also use pencil to sketch in your image, but this is not recommended as graphite can eat away at your pigments over time, showing through your painting.
- Now you’re ready for the underpainting. Underpainting involves sketching the subject in a very thin layer of paint. In any of these methods, it’s important to thin out your oil paint with either solvent or another painting medium, like linseed oil. You’ll want this layer to dry fast & flat.
- Grisaille – an underpainting of with just white, black, and grey. This method allows you to focus just on values without the confusion of color.
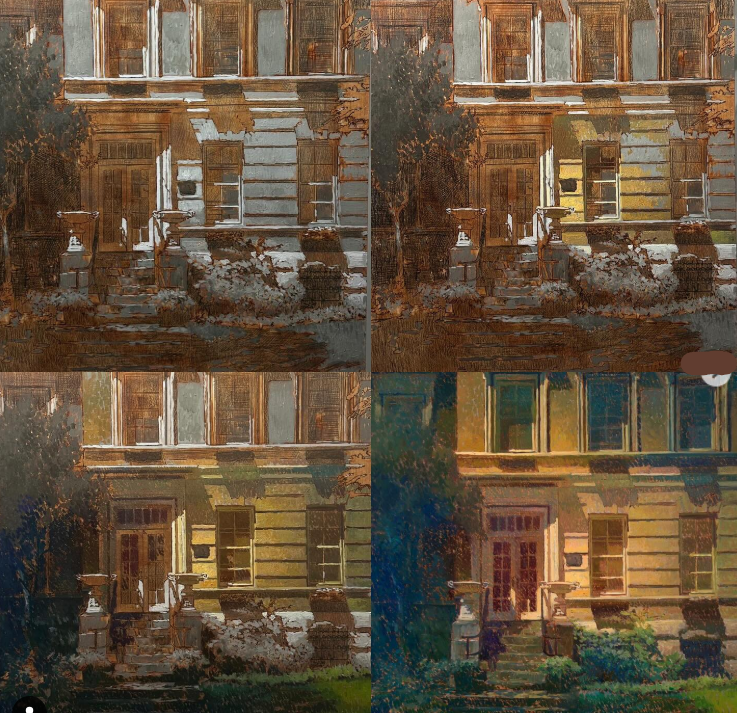
Visual Arts Passage instructor and mentor Raymond Bonilla is a master of the grisaille & glazing technique.
- Verdaccio, Brunaille, Ebauche -see above, but make it another color.
- Imprimatura – literally, “the first layer of paint,” this tones the canvas with a wash of color. This layer will affect all other layers, so keep that in mind. A bright orange imprimatura is often the hue of choice for western artists capturing a radiant cornflower-blue sky.
- Imprimatura + wipe out – after toning the canvas in on color, you take a rag, wipe-out tool, or other tools of preference to carve your highlights and mid-values into the underpainting.
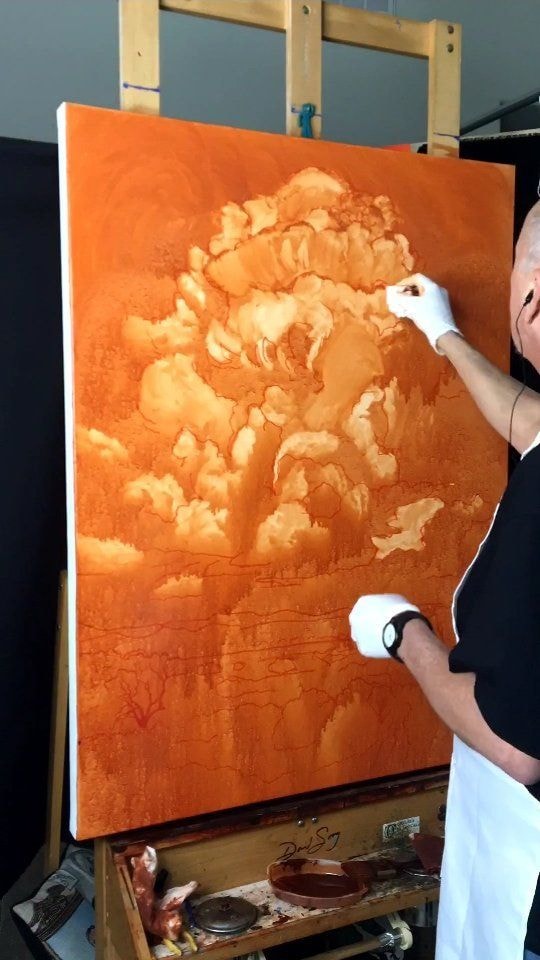
Landscape painter Layne Johnson applying an imprimatura & wiping out his canvas.
The Second Act – More Paint
So you’ve locked in your underpainting. Now what? Layers, my friend. Here’s what you need to know about working in stages:
- You may have heard this rule before: ‘fat over lean.’ But what it means can be really confusing. What you should remember is this refers to the drying times of different layers, and each subsequent layer should dry more slowly than the one beneath. Always paint ‘thick over thin’, or ‘slow-drying over fast-drying’. Here’s the why: thin/lean paints dry faster – when there’s medium or solvent mixed into the pigment, the wet things evaporate much more quickly. If a lean paint is applied over a fat, thick, straight-out-of-the-tube pigment, the slow-drying fat layer will continue to move as it dries, and the thin layer will crack, shift, and do other hocus-pocusy things on the surface of your painting. Ew?
- When you start a new painting session, once your previous layer dries, it can help to “rewet” your canvas if it’s dry to the touch. This process is called oiling out, and involves gently rubbing the whole piece (or just the area you’re working on) with a thin layer oil to bring the dried pigments back up to their intensity, and give your wet paints something to glide onto. Just be sure to make this layer very thin—even wiping excess off the canvas before you start painting, as oil can pool & drip.
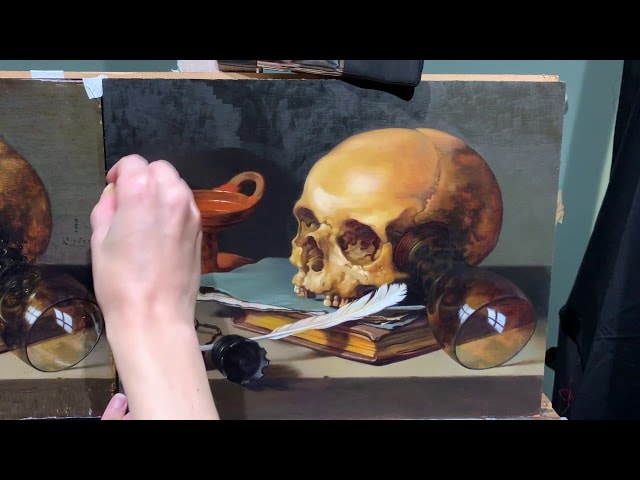
Oiling out involves gently applying a layer of oil before a new painting session. As a trompe l’oeil painter, Julie Beck will spend weeks an months on a single painting, requiring frequent oil-outs to work effectively.
- Building up texture – Textures in oil painting create focal points. The thick spots of texture that retain brushstrokes or show the body of the paint are intentional. Check out the gloopy highlights in any Rembrandt, a perfect example of purposeful build-up. While there are a million examples of texture & impasto, from subtle to in-your-face, You’ll have to figure out for yourself what a specific painting is asking for. Mediums like gels & cold wax are ideal for impasto passes.
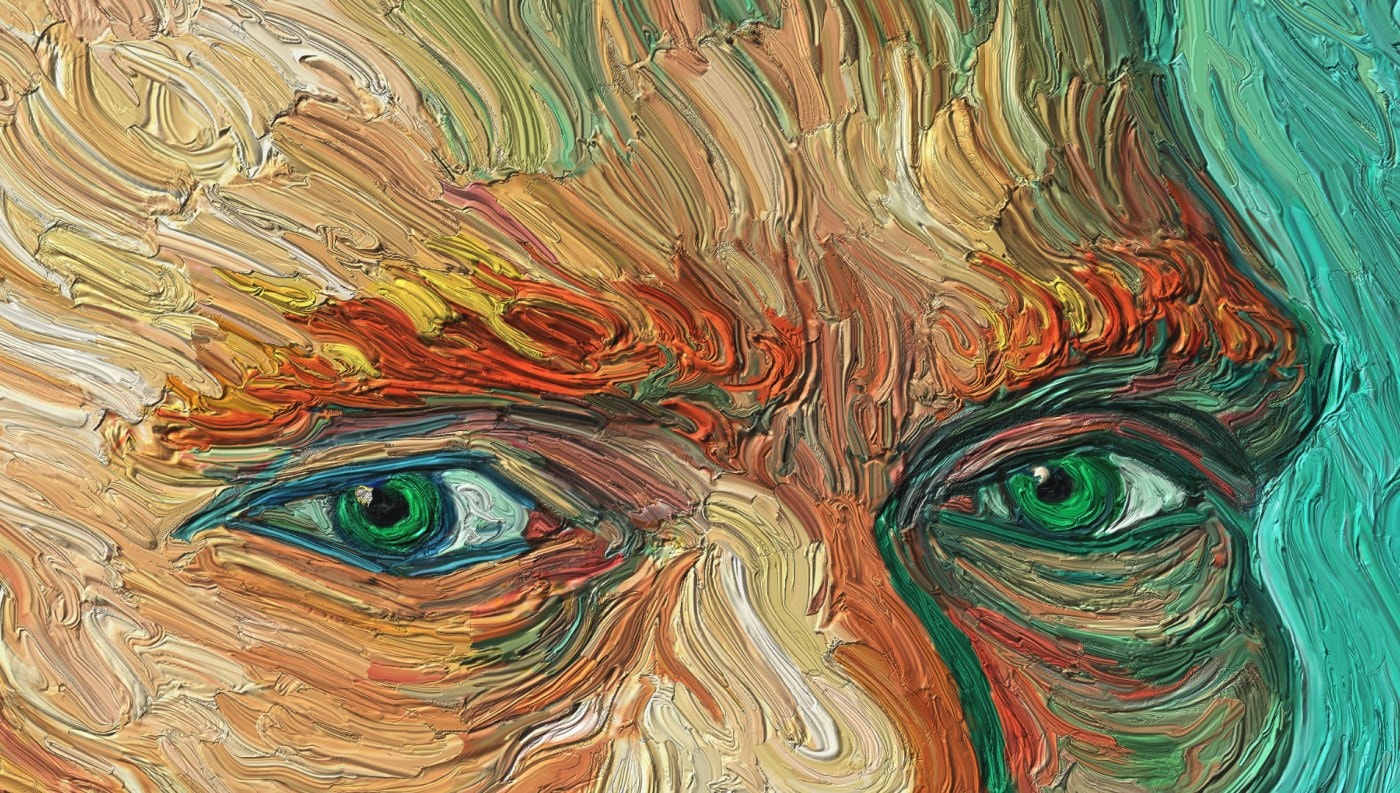
Van Gogh is often a reference for thick impasto paintings.
As you practice, you’ll get better acquainted with the various pigments and their characteristics. You’ll probably make some mistakes, like disturbing an area of alizarin crimson before it’s dry, or totally misjudging the true value of a sunken raw umber. But that’s the joy of practicing, you get more savvy with time. You might work on a painting in one sitting and call it done, or several sessions, or several weeks, months—even years. The beauty of oil is that it’ll wait for you.
Working with Brushes and Palette Knives
Oil brushes come in all shapes and sizes (literally). Some painters prefer relying on the more traditional hog hair brushes, while others will opt for synthetic. In general you want something that is rigid but also flexible, as ultra soft brushes just aren’t strong enough to hold your oils.
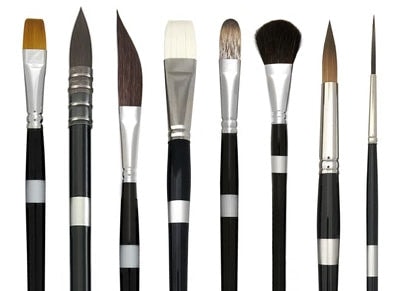
- Experiment with different oil mediums, such as linseed oil or Liquin, to achieve desired drying times.
- While the most common use for a palette knife is to mix and blend oil paints on your palette, you can also use them as you would brushes. One of the best jobs for the incredibly versatile palette knife is to apply thick paint and create impasto effects.
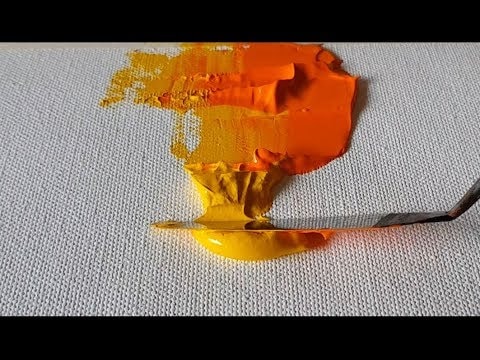
Using a palette knife as an impasto painting implement is like frosting a cake—too fun.
Finishing Touches
There are so many old and new oil painting techniques that will elevate your painting process. Here are just a few.
- Glazing – in Visual Arts Passage’s Fine Arts Program, the instructors have a motto: when in doubt, bring the glaze out. Glazing is the process of thinning out a transparent pigment (one without white pigment, generally) with a medium, like mineral spirits, Gamblin’s Neo Megilp, Winsor & Newton’s glazing medium, or some combination of your favorites. If you mix your own, try looking up another artist’s recipe; there should be enough of a binder to keep the pigment “together,” but enough of a thinning medium to let it run loosely & thinly over the canvas. Glazing is like putting a filter over your whole painting: it helps unify the picture and brings out focal points.
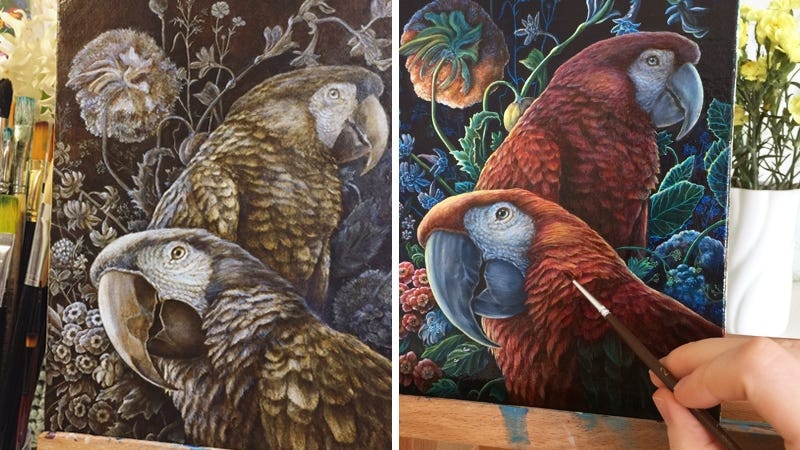
You can use this glazing technique to layer vibrant color on top of a underpainting to ensure your values stay correct.
- Scumbling – scumbling is a form of “dry brush technique,” using your oil paints without the benefit of any medium. Holding your brush lightly, and scribbling/stumbling it across sections of your work, is a great way to add texture, atmospheric effects, visual “noise,” and more.
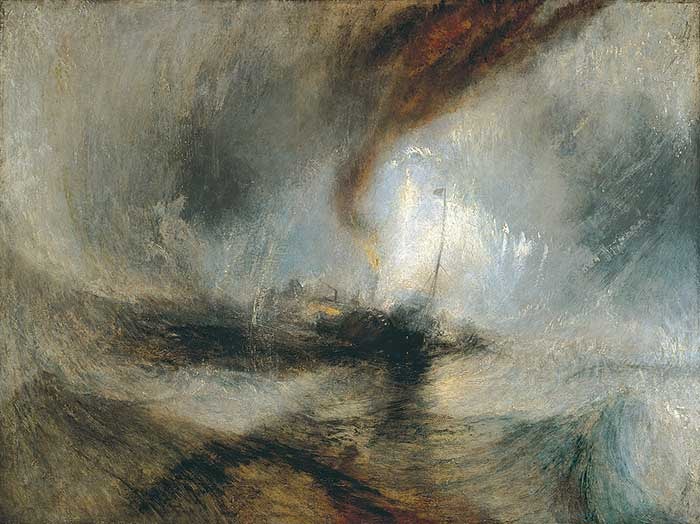
JMW Turner was the scumble master. In Snow Storm, you can see how he scumbled both darks & lights to create a sense of chaos and a maelstrom of movement.
- Sgraffito – here’s a word you’ll often here in a pottery studio. Sgraffito happens when you cover an existing layer with a new, wet layer, and scratch or gently wipe/pull out that top layer. A palette knife or wipe-out tool is great for this application.
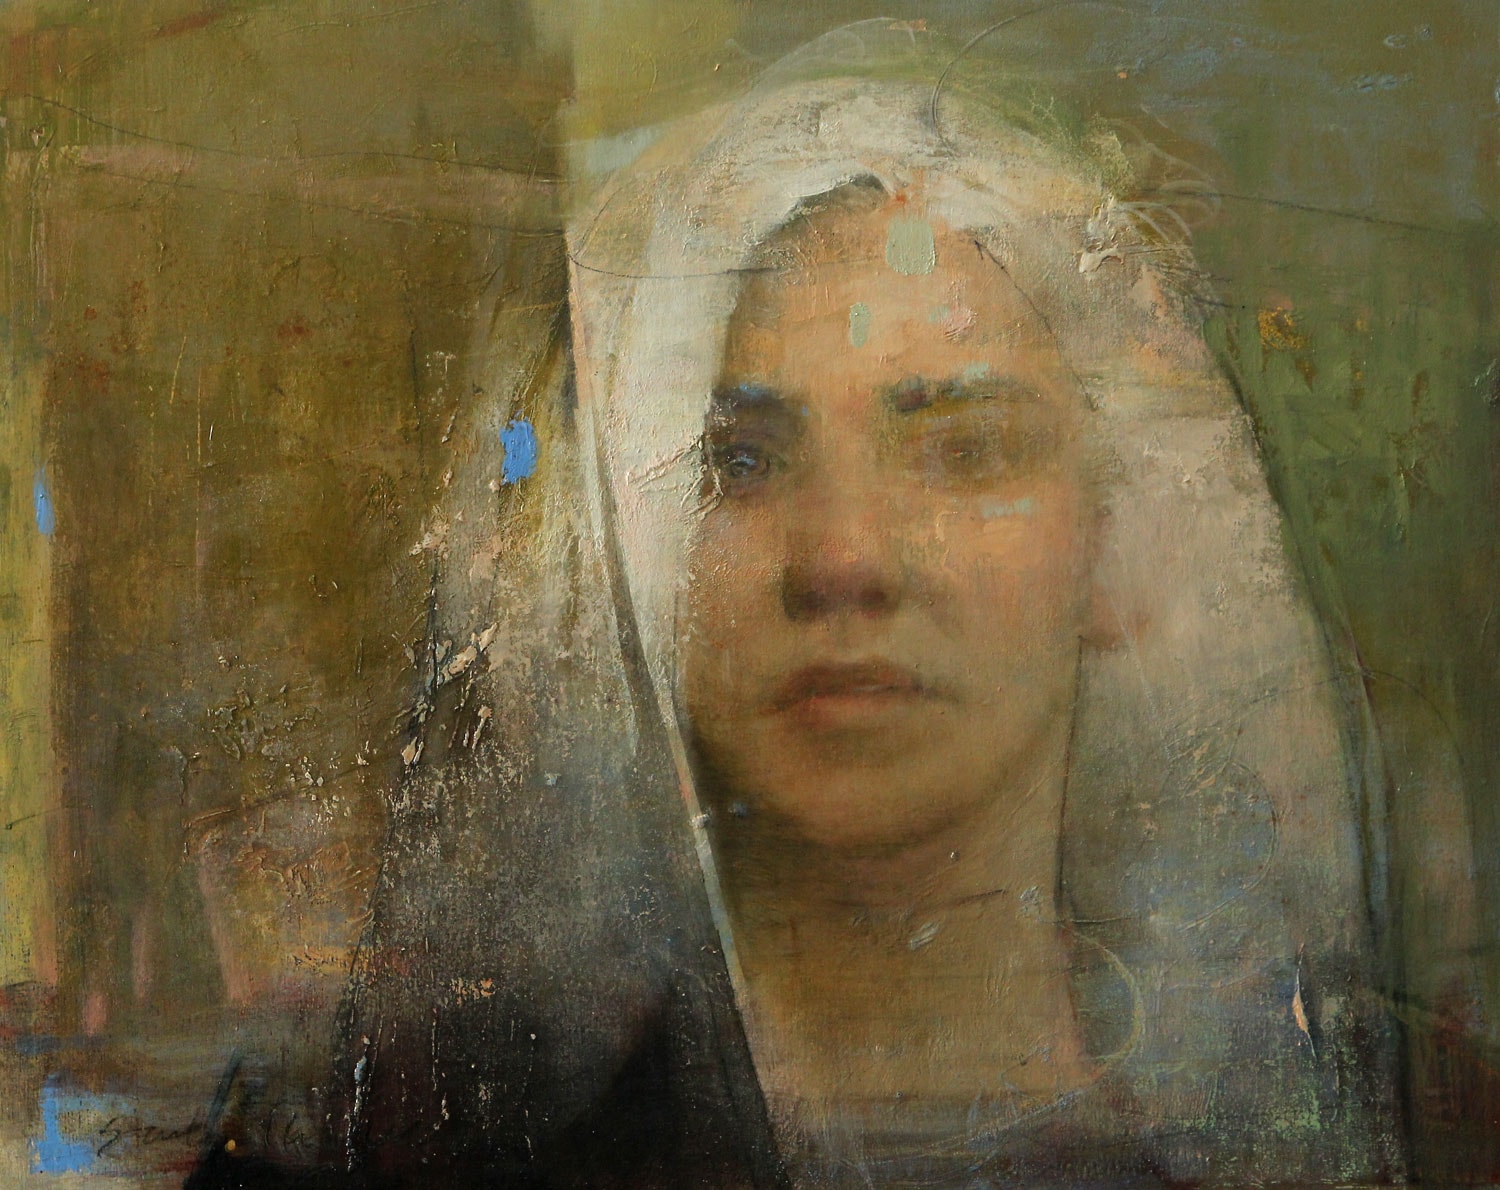
Stanka Kordic is a contemporary painter who combine sgraffito, scumbling, glazing & more to great effect, mastering the genre of “disrupted realism.”
- Sfumato – When you fuse the boundaries between shapes and colors. This refers to blending, blurring, and soft transitions done in very thin layers. It can be done wet-into-wet, or as a final effect with a glazing medium and controlled, hazy brush work. For a dreamlike scene, sfumato achieves the desired effect.
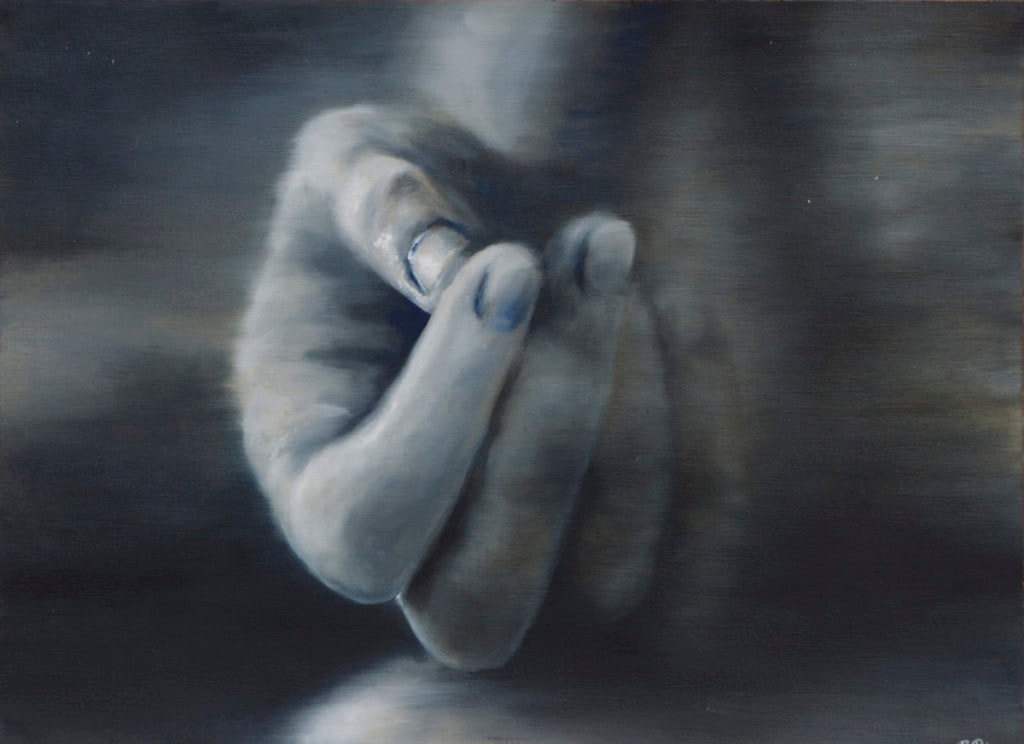
You can see the effect of sfumato in much of Gerhard Richter’s earlier work.
- Wiping out – as you glaze and scumble, you can take a rag, brush, or another clean tool in the same session and physically wipe off the areas of color that you don’t want present. Maybe you’ve a glazed a golden glow over the whole piece to give a golden-hour effect, but you still want your highlights bright white: wipe out those areas.
Oil Painting Techniques for Maintaining and Conserving Your Painting
Oil takes a very, very long time to completely dry. During that time, it’s important to keep your work in a safe place.
- Avoid exposing your paintings to direct sunlight or high humidity. I like to tip mine towards a vertical surface to discourage dust settling on them.
- Use a soft, dry lint-free cloth to dust your painting regularly, & before exhibition or sale.
- Once your painting is completely dry, the best way to protect your artwork in the long-term is to apply a coat of varnish. This will not only seal the surface of your painting and bring the colors up to their most brilliant hues, but also protect your painting from dust, UV light, and other environmental factors. Varnish is a removable, replaceable, and critical final layer in the conservation of artwork. Some varnishes have a glossier finish, while others will leave you with a satin or matte surface.
- Documentation is another vital step in your art process. Whether you photograph the work yourself, or send it to a professional scanner or photographer, having high-resolution, detailed and true-color images of your work is critical to your success as a painter. For those of us working professionally, selling our work online or in galleries, a proper photo will make or break a sale, competition win, or professional connection.
- All art can benefit from the protection of a frame. While some work might not need it (such as gallery-profile painting surfaces), it’s a good step for you to consider, as frames will protect those delicate edges of your work, as well as the vulnerable back side of the canvas. Professional framing services can be expensive, and many artists like our very own mentor Cassandra Kim opt to frame their own work.
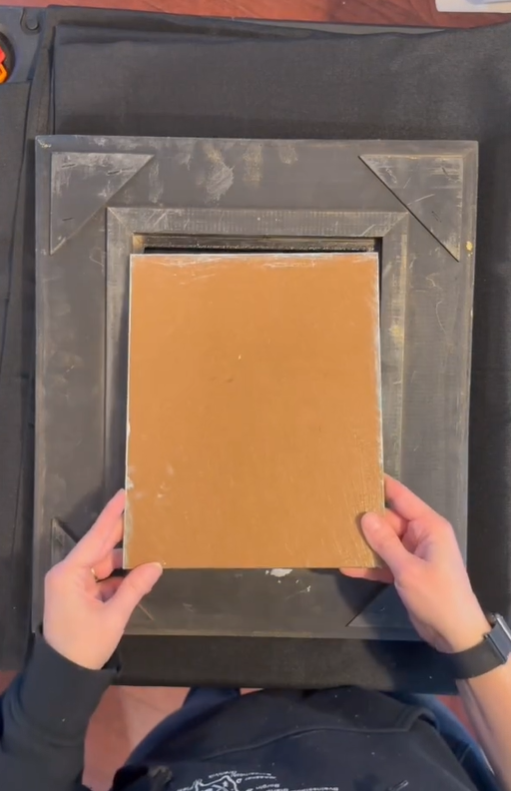
Cassandra Kim shows off her framing process in a recent Instagram reel. In our Fine Arts track, she’ll guide you through everything you need to know about framing, documenting, and conserving your work.
Troubleshooting & Broadening Your Oil Painting Techniques
Some of the most common mistakes painters make are a result of having the wrong information, or taking a best guess. Before you throw in the painting rag, let’s see if we can troubleshoot.
- Using too much oil in your paint layers. This can cause them to become too flexible and prone to cracking. The fix: pay attention to the what you’re mixing into your colors at each stage, and adhere to the fat over lean rule.
- Using one brush for all your colors. Just wiping off your brush in between passes often isn’t enough to get the pigment out. The fix: use multiple brushes for different hues in a single session, and be sure you’re cleaning your brushes or resting them in a neutral oil (like safflower) when you’re not in the studio.
- Painting in direct sunlight/dusty environ/not properly ventilating, & more. An improper workspace can lead to slew of problems, from misjudging values and paints drying to quickly, to unwanted elements drying in your work. The fix: keep your workspace tidy, well-lit but away from direct sun, and generally comfortable (so you actually want to paint!)
- Some pigments seem to dry flat, or “sink in” to the canvas. This is a common occurrence that can leave you feeling frustrated. Some pigments just dry hyper-fast, while others (looking at you, alizarin crimson) seem to defy the laws of nature. The fix: “oiling out” & retouch varnish bring your paints back to their brilliance. Trust that when you do your final varnish, all the colors will come back up to their true vibrance and value.
- Varnishing too soon. While some varnishes, like Gamblin Gamvar, are allegedly safe to use when the thickest part of the painting is completely hardened, varnishing too soon can lead to discoloration, clouding, cracking and more. The fix: it is okay to wait months to varnish a painting, even if you have to send it off to a gallery or client. My recommendation is to use retouch varnish, once a painting is dry to the touch, if you have to send it away. This is a temporary protective layer that can be painted or varnished over.
- Overmixing your mediums. You’ll know when your mixture of pigment-to-medium is wrong—the pigment will break apart and stratify, the medium will run on the canvas, etc. The fix: all manufacturers have recommended pigment-to-medium ratios on their products, and while you don’t need to get out the chemistry set to measure exact quantities, as you experiment and practice you’ll start to get a feel for the right balance.
- Muddy colors. The ability to blend oil is both their benefit…and their drawback. The fix: if you find your work is getting muddy on the canvas, you might need more time before painting sessions. Alternatively, do some practice paintings in the alla prima or direct methods. As you train to your brain and hands to purposefully place each brushstroke, you may find your paintings becoming more intentional, vibrant, and less blended.
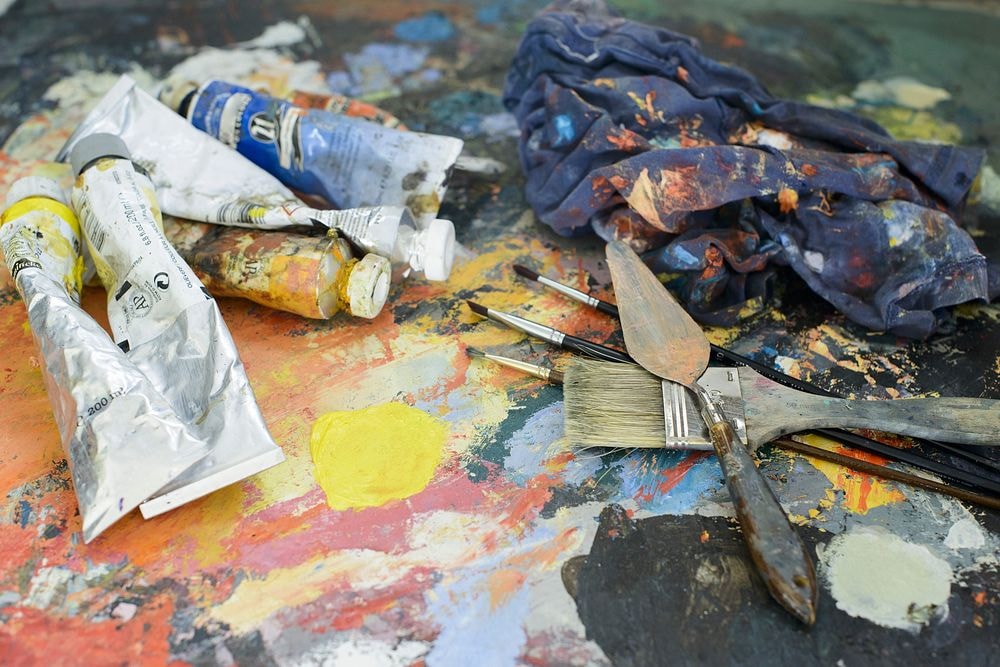
A messy workspace is asking for trouble.
Stay tuned for a more extensive post on problem solving and troubleshooting your oil painting techniques!
You can join us every Thursday at 7 pm ET for this awesome free session: https://visualartspassage.com/drawing-hive/
Developing Muscle Memory with Drawing Exercises
Remember that learning a new skill takes time, and honing that skill takes repetition.
Repetition in your drawing practice gives you more control over what you create. In just a few months or weeks of doing these exercises, you’ll notice your brain-muscle connection improving. If any one drawing exercise has inspired you to put pencil to paper today, that’s awesome. And if not, maybe by process of elimination you’ve gotten just a bit closer to finding a rhythm that suits you best. Above all, I hope your takeaway is that drawing should be, first and foremost, fun — inspiring, life-giving, playful. While your regular practice can sometimes feel like drudgery, reminding yourself to make the process thrilling will jumpstart your creativity.
