Pencils and Pixels; The Art of Tradigital Mixed Media
How to use digital and traditional media to push your work in new directions
Nate Sweitzer
I stumbled into a few personal truths about art-making in my first couple years at school.
I found it frustrating to use traditional media as a finishing tool.
Every medium has a learning curve, and I was trying to learn all of them at the same time. This made the prospect of starting a piece an anxiety-inducing task. I would carefully design my drawings on the illustration board, then lose them halfway through the finish after a series of misguided acrylic washes. I had to finish pieces in colored pencil just to avoid painting.
Extensive process work led to well-planned but unexciting finished pieces.
I was making each mark thinking “I hope I don’t ruin this,” because I knew how much time I’d spent planning the image.
The undo button was my best friend.
Luckily, working digitally makes it virtually impossible to ruin a piece. With unlimited brush options, layers, and the safety net of ctrl-Z, there are virtually no repercussions for experimenting or making mistakes. This should lead to more confident finished pieces, right?
…and worst enemy.
Wrong. I was redoing each mark a dozen times to get my drawing right. I would finish rendering a passage and go “hmm maybe I should’ve used that other brush,” and redo it three more times. I felt suffocated by the limitless options. My pieces were gradually improving, but I wasn’t enjoying the process of spending thirty hours staring at a screen and turning layers on and off.
I needed a process that provided the structure to reliably solve pieces and the freedom to visually experiment in a non-destructive setting so I could continue to hone my illustrative voice and craft.
The Tradigital Process
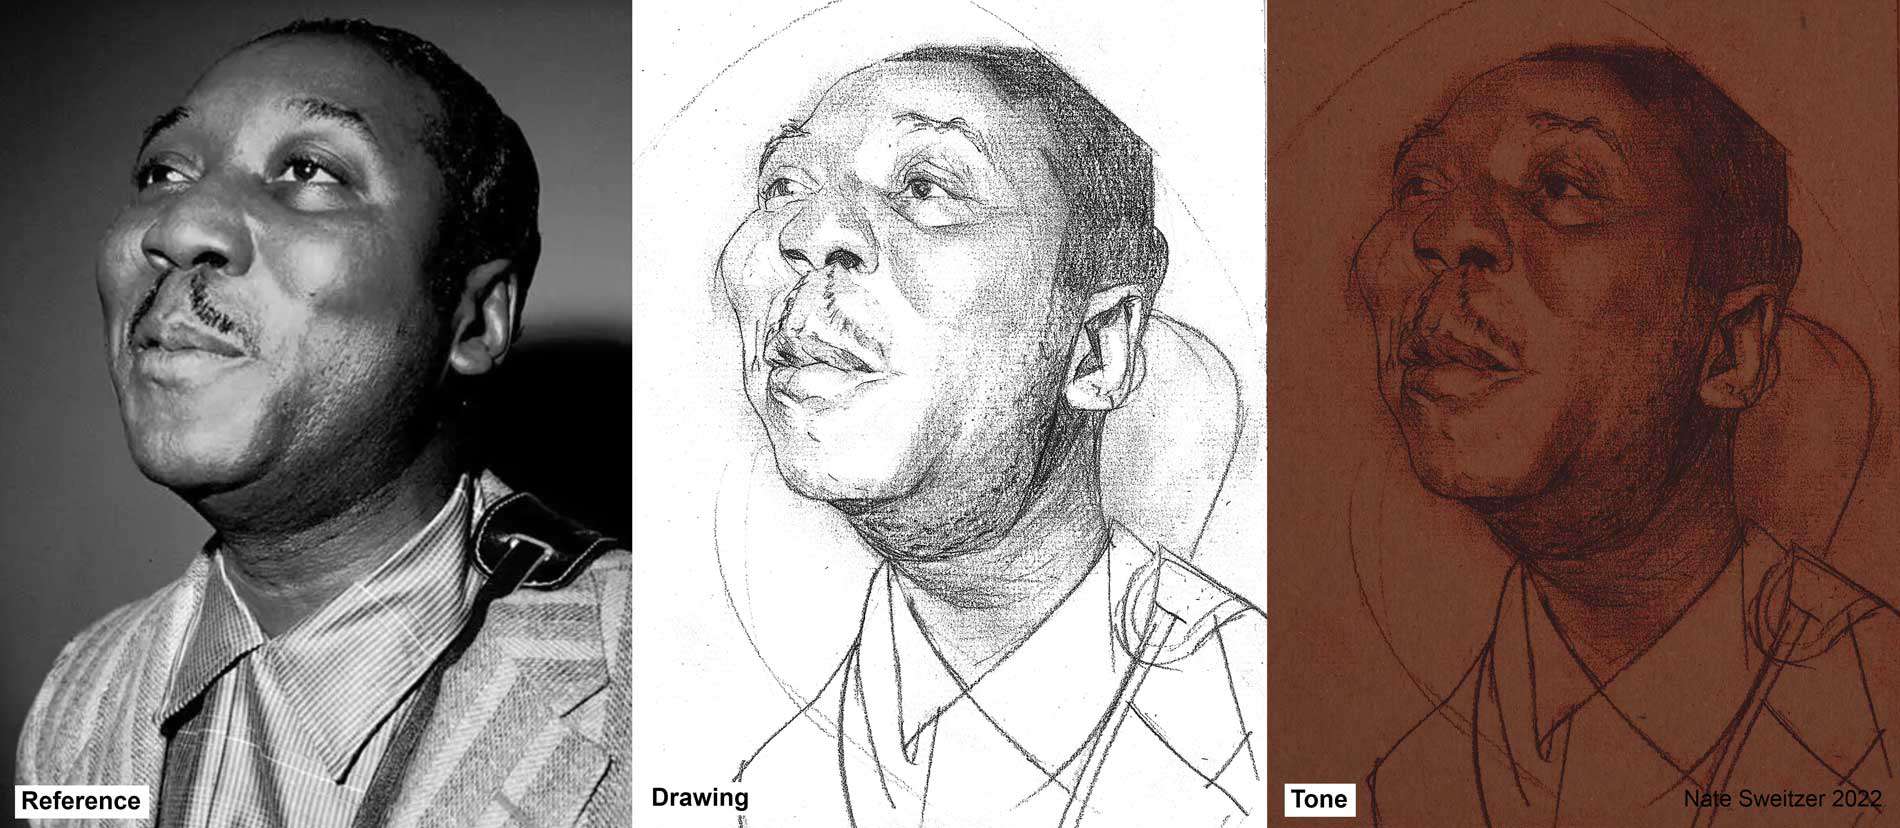
Drawing
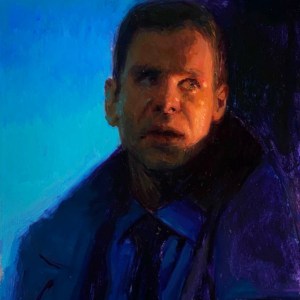
This can be anything from a full render to simple line, depending on the style of finish you’re pursuing. I tend to draw without construction, starting from an eye and working my way around the figure. This gets me to an interesting result faster than hyper-designing my underdrawing and helps keep my drawing loose. I’ll often lightly render at this stage by smearing my drawing and erasing the highlights. For this piece, I used an excellent photo of Muddy Waters for reference.
This process works best on the backbone of a solid traditional drawing and quality photo reference.
Scan/Seal
This step allows you to preserve and potentially adjust your drawing. For this piece, I scanned my drawing to begin working digitally. You can also scan, print, mount, and seal your drawing (with matte medium) on a board to continue to the next step traditionally. Sometimes I’ll bring the drawing into Photoshop and chop it up or use Warp/Liquify to push the line of action or likeness a little more. This gives me the chance to“retroactively construct” my looser drawing, which reduces the pressure to absolutely nail a drawing on the front end.
Tone
The next phase involves the introduction of tinting, texture, and midtone in the form of a “wash”. This can come in the form of a traditional acrylic layer as well as digital toning. The idea here is to bring the piece to a unified color and value range so you can pull the lights and darks out later. Toning with digital tools allows me to find the dominant color temperature of the piece in the early stage, build up my lights and darks with a complementary tint, and then adjust at the end if need be. Photoshop has wonderful options for toning a b+w image. I usually toggle between Color Balance, Photo Filter, Gradient Maps for tone and use the blending sliders in Layer styles to mix.
Some tools for digitally toning using Photoshop. I also recommend playing with Levels to make sure your values are working properly.
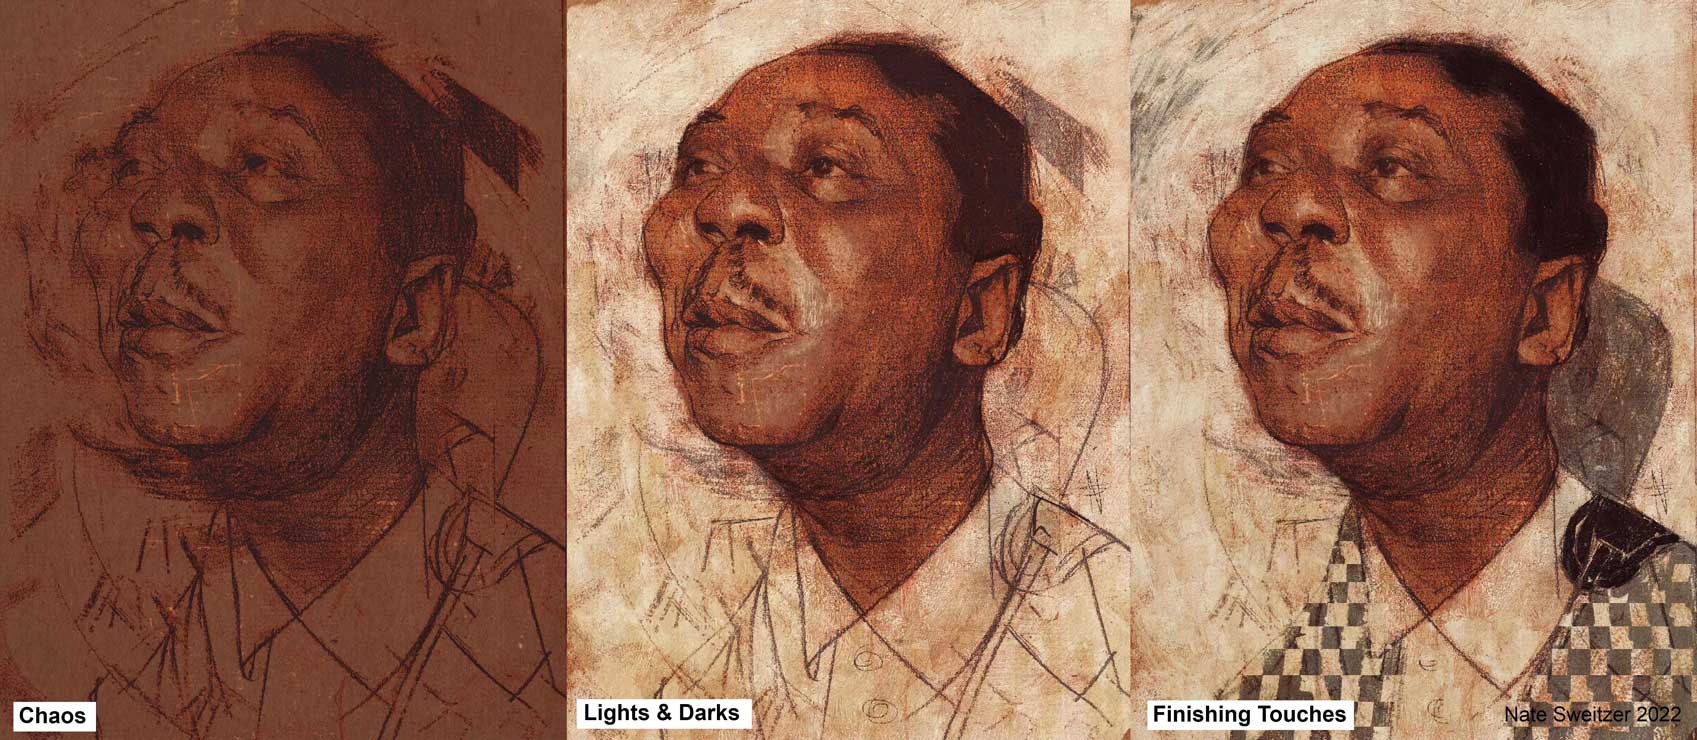
Chaos
The thinking behind this step is to create unexpected marks and passages to solve when I reestablish my lights and darks. We can turn the negative space of the toned drawing to an activated midtone with texture and mark-making. This can be achieved either traditionally, with a combination of dry and wet media, or digitally, with texture brushes (I recommend Greg Rutkowski’s) and clone stamping. Sometimes I’ll end up covering most of this stage up, but incorporating an element of abstraction and experimentation at this point in my process helps keep me excited as I approach the finish.
Working from chaos to order can help keep your creative juices flowing when you’ve already spent multiple hours on a piece.
Lights & Darks
Time to restore order. Here’s where I refer back to my color and value studies and carve in my lights and darks appropriately. This stage can involve naturalistic rendering, digital painting, “inked” linework, or can simply involve bringing in flats to reestablish your negative space, making the more nuanced textural areas stand out. If you’re working digitally at this point, you can sometimes literally reestablish your drawing by mixing your linework back in at the desired level of transparency. Part of the game is deciding which areas need more refinement and which spots to let the rhythms of the previous step show through.
Finishing Touches with Tradigital Art
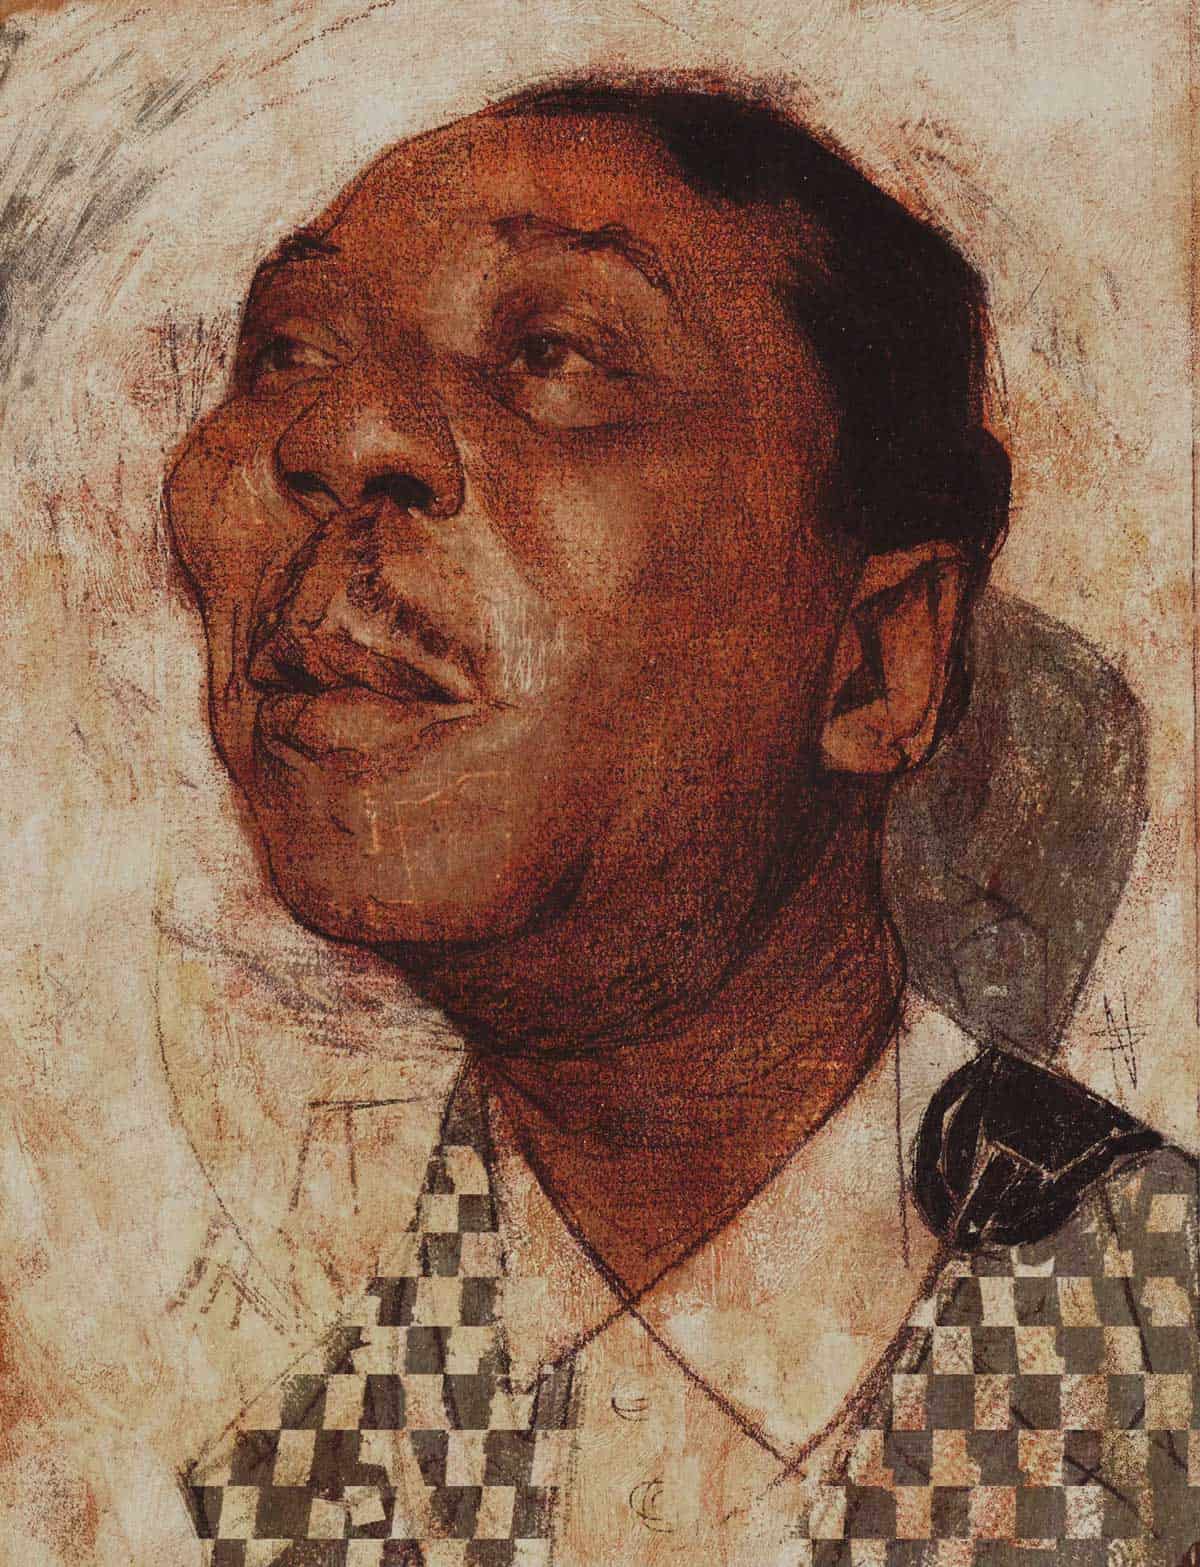
Now we bring it to a finish. This step can take 8 minutes to 8 hours, depending on your deadline and level of neuroticism. This can be a good time to look for places to add pattern and make sure your focal points are working as designed. You should spend a lot of your time in this phase squinting or looking at your piece from across the room – this cuts down on unnecessary adjustments. (I say this as I spent the last two hours making marginal alterations to Muddy’s left eyelid.)
Now that we have a framework for purposeful experimentation and a method for solving each image, we can adapt the process to different circumstances and tackle more complex subject matter. Here’s an example where I photocopied my drawing and used acrylic and Nupastel to build up an interesting surface texture. When I scanned it back in, I overlayed my drawing on top of the textured layer to restore detail.
Building up texture with traditional media can help give your piece a tactile quality.
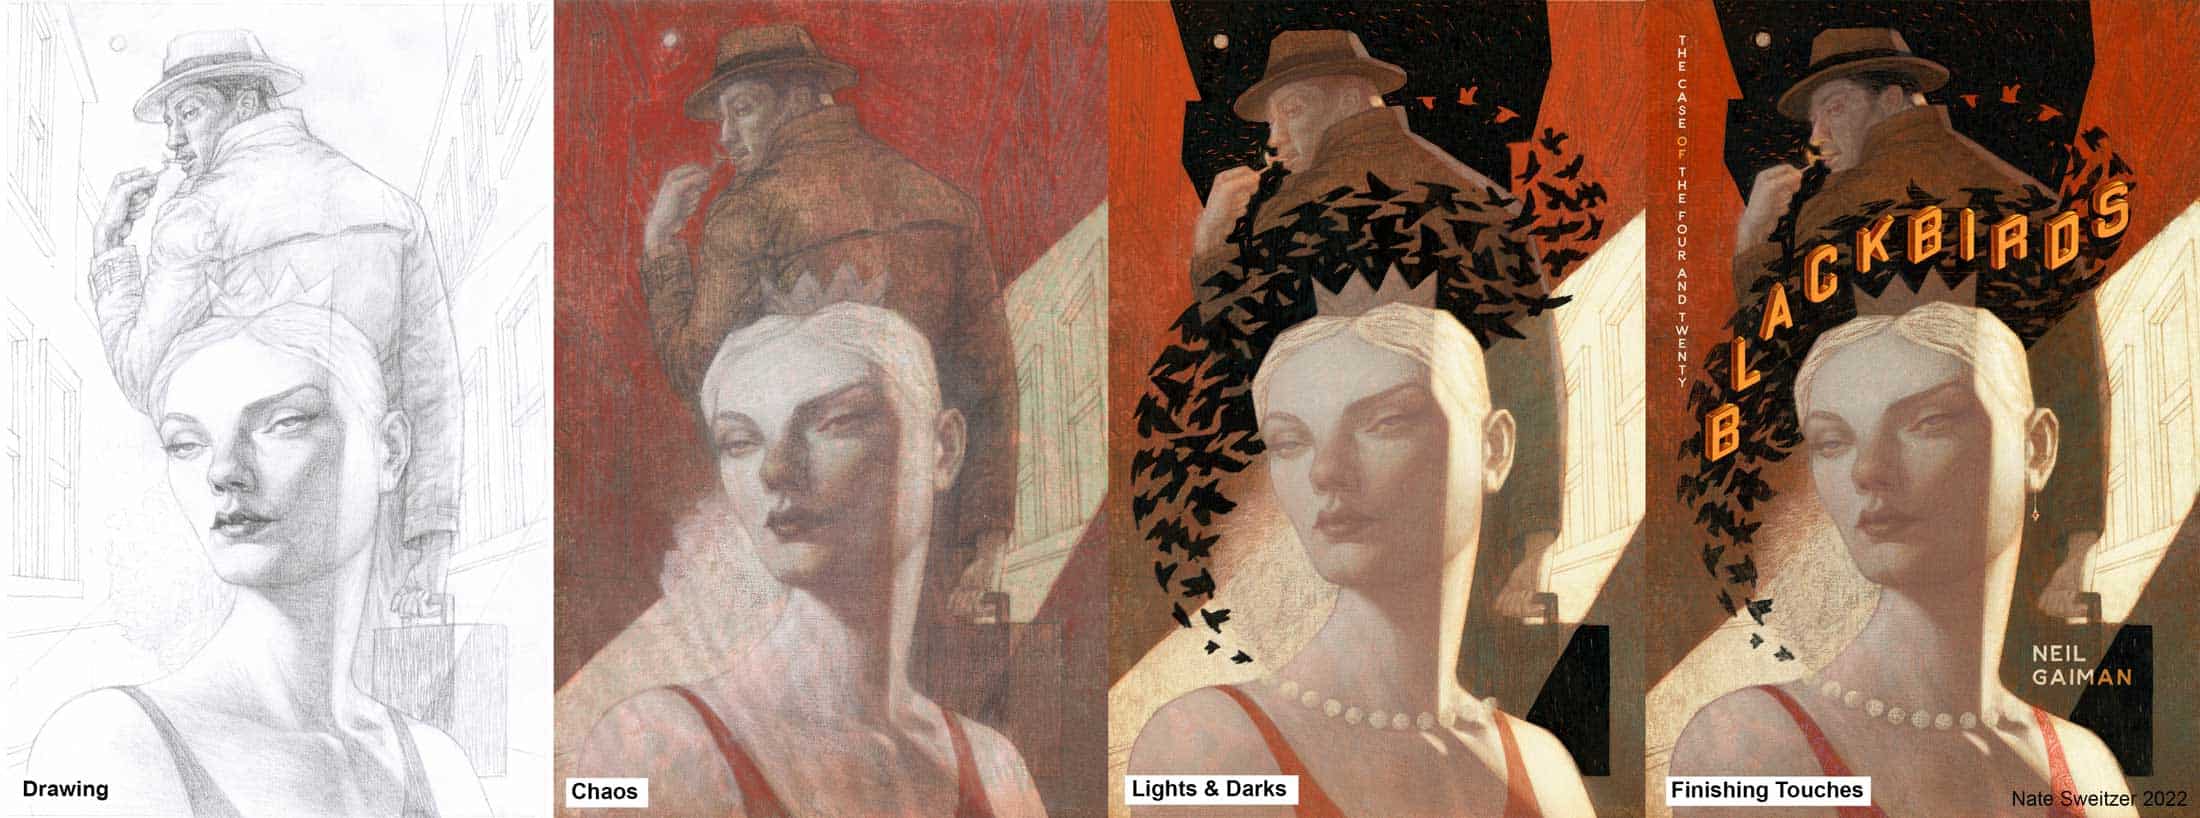
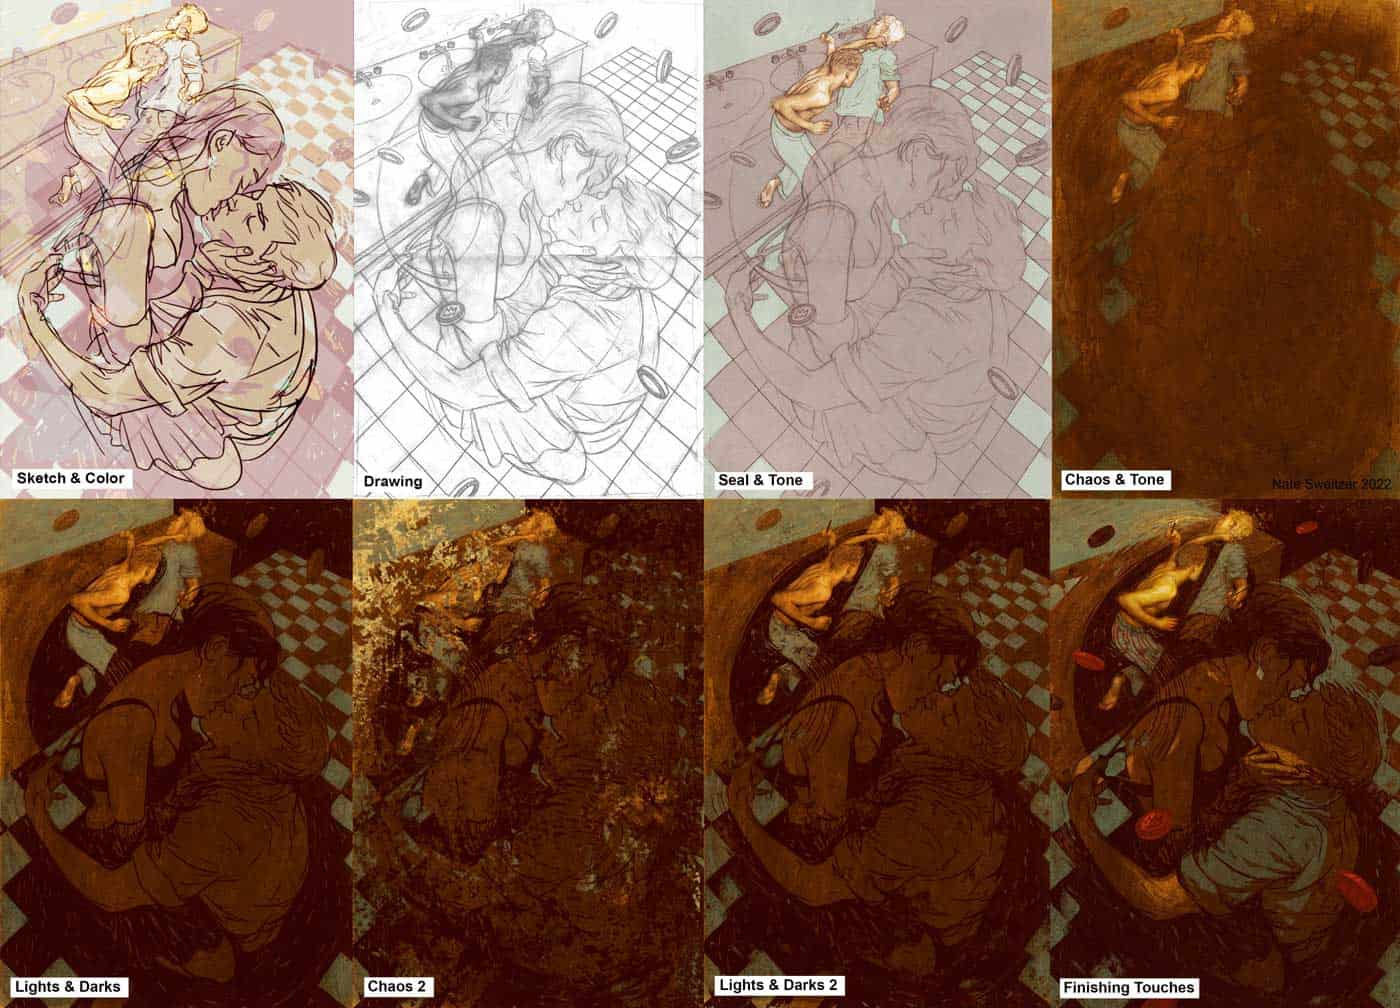
For the following piece from my Catcher in the Rye series, I had a pretty carefully designed composition that wasn’t going to allow me to draw without construction. I did all of my process work digitally, then printed out my sketch and used a light table to block in the shapes before refining the drawing. From there, I scanned it in, lightly toned it in Photoshop, and printed it out with a laser printer. I transferred that print to my board, did a wash of yellow acrylic, then a gouache pullout in burnt sienna before scanning it back in. This was supposed to be my “chaos” phase, but when I blocked in my darks in Photoshop, I felt like the piece still needed more energy, so I clone-stamped the living hell out of it and started pulling back until I was happy with the surface quality.
Once our framework is set, we can repeat steps to achieve the effect we’re looking for. This piece started digitally, moved to traditional, then back to digital, back to traditional, then digital again before I brought it to a finish. Excessive? See below.
Some Things to Consider
Taking self-inventory is an important part of improving as an artist. Once your foundational skills are solid, it’s up to YOU what your art-making process will look like, and that journey starts with asking yourself challenging questions.
Which elements of your workflow do you enjoy the most? Which parts seem like the greatest barriers to you creating successful work? Is it worth pushing through these barriers, or is there another route to success that favors the process you enjoy? What industry and audience is most suitable for your desired workflow? This is just the start.
Finally, what artists in that industry do you look up to?
I was fortunate enough to spend a semester studying various mixed media techniques with Francis Vallejo, my faculty mentor at the College for Creative Studies. This process was based loosely on C.F. Payne’s technique, substituting the less dorm-friendly steps (oil wash and lacquer matte) with safer and more flexible digital tools. I highly recommend reaching out to your favorite artists and experimenting with their techniques. It’s hard to figure out what you like without experiencing a few different processes first.
I hope this sparked some ideas! Feel free to reach out if you have any questions.
Nate Sweitzer
Illustrator & Painter
